Hitron - How to set up DDNS
A step-by-step guide on how to enable Dynamic DNS (DDNS) on your Hitron router device.
How to set up DDNS on the Hitron router
Step 1: For DDNS to be enabled, you’ll need to choose a DDNS provider, create an account with the provider and then download their software. There are numerous providers in the UK that provide a free DDNS service that can easily be downloaded over the Internet. We recommend that you do a Google search on ‘DDNS UK’ and pick one of the advertised providers.
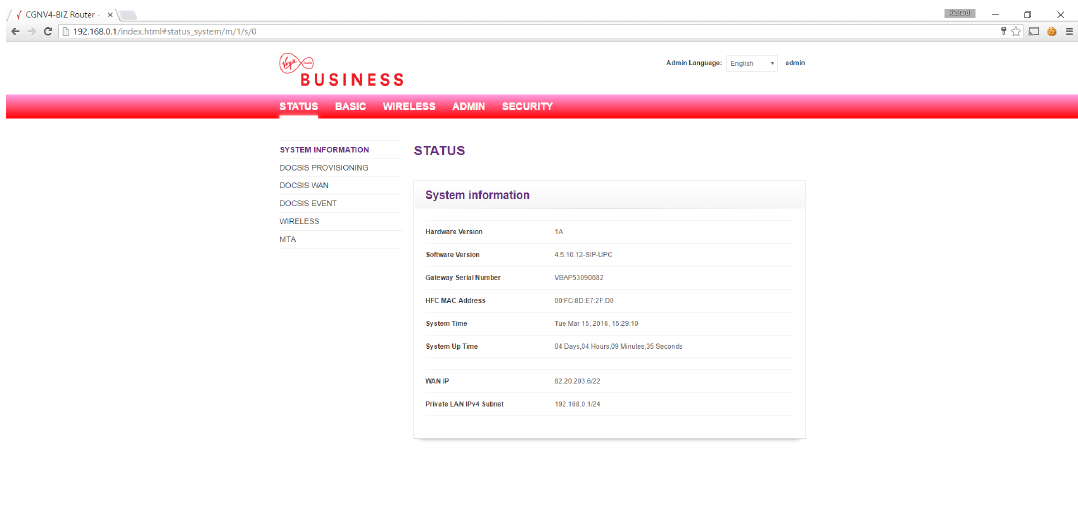
Step 2: Once you have created an account with a DDNS provider and the software has successfully been downloaded to your laptop/device, you’ll need to log into your Hitron router GUI using the IP address 192.168.0.1. This address may have been changed by one of your users. If so, use the modified address to log into the router.
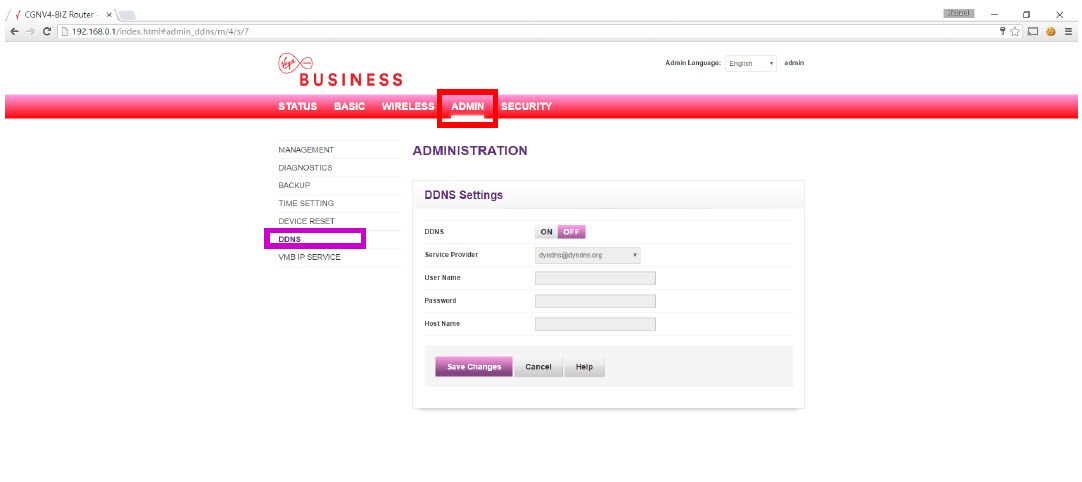
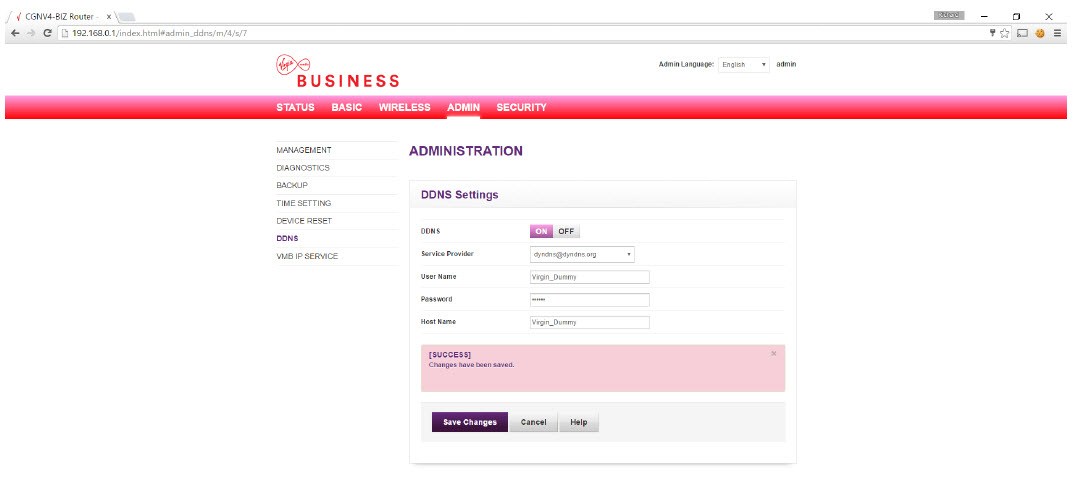
Step 3: Using the menu at the top of the GUI page, select the ‘ADMIN’ tab highlighted in red and then click on ‘DDNS’ in the left hand column, highlighted in purple.
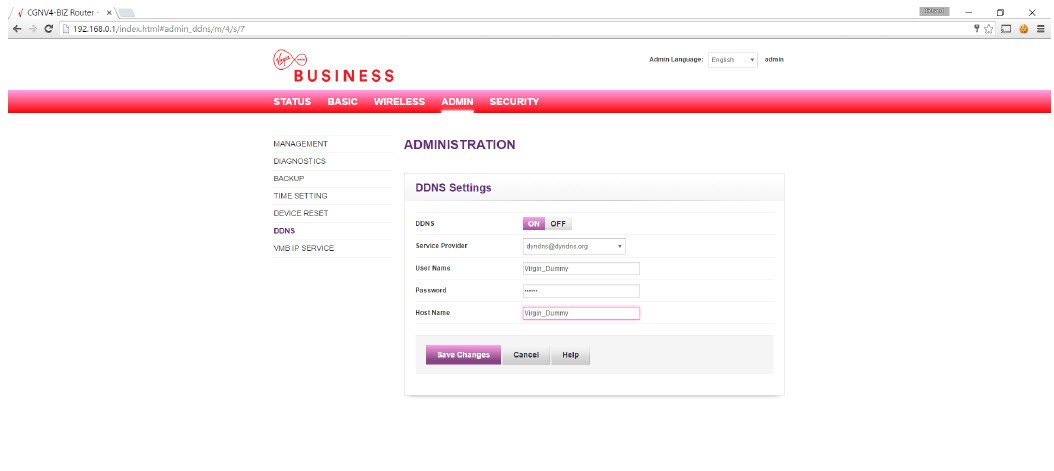
Step 4: Ensure your DDNS settings are turned ‘On’ using the toggle buttons in the Settings. Choose your provider from the ‘Service Provider’ dropdown. Enter your username and password, along with the host name, which is the name of your DDNS provider. Save the information using the ‘Save Changes’ button at the bottom of your screen.
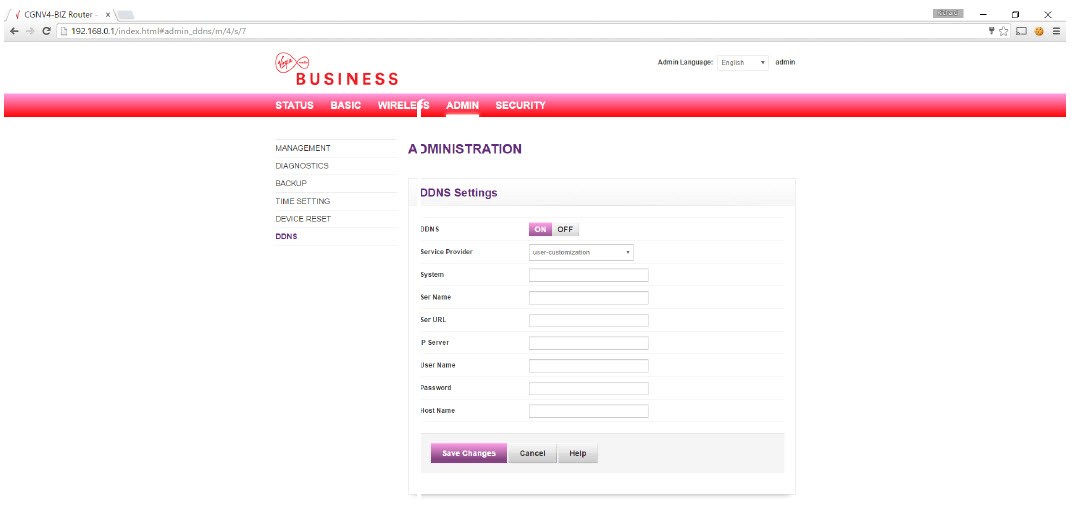
If your DDNS provider is not listed, then select the option ‘Usercustomization’.
Complete the System, Ser Name, Ser URL and IP server fields, as supplied by your DDNS provider.
Step 5: You should then see a Success Message, as shown below. Your DDNS is now configured correctly for your Hitron router.
In many cases, port forwarding will be required for DDNS. To add port forwarding visit the 'How to set up port forwarding' article.